Showing posts with label chocolate. Show all posts

Tuesday, February 21, 2012

TWD-BWJ Chocolate Truffle Tartlets

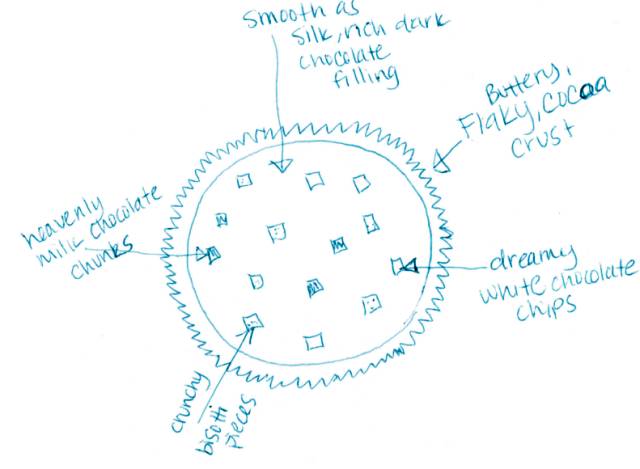
It's February, and that means one thing, CHOCOLATE! These chocolate tartlets have a buttery cocoa fluted shell and rich, decadent dark chocolate truffle filling with milk chocolate, white chocolate and biscotti chunks mixed in. I was excited to use my little fluted tart pans since I purchased them in 2009 for Tuesday with Dorie's poached pear tartlets.

The chocolate truffle tartlet recipe was surprisingly simple though it had several steps and required refrigeration between them but it went fast and I was able to knock these out during my kiddos nap. I took four tarts to a ladies game night, left one for the hubs and the monkey to share on their "daddy/daughter Valentine movie night" and took one to my boss. (I am such a kiss up!)

I had so much fun making these and I kept meaning to take photos, I really did. But, I was in a rush and couldn't find my camera. Then someone at game night promised to send me a photo and yet, I still don't have one. See my best replacement effort below.


Game night ladies, the hubby, the munchkin, and my boss all loved this dessert. I really liked it, too and (don't tell anyone) I'm not a huge chocolate fan.

I have really missed baking and am so thankful to be back in TWD. It feels great to spend some time creating something I can share with others. It is a much more productive activity than watching Real Housewives of Orange County and playing Word with Friends. (I'm tangerinetart on WWF, play me!)

This week's Tuesday's with Dorie - Baking with Julia is hosted by Jessica, Spike, Jaime, and Steph. You can find the recipe and some really impressive photography on their amazing blogs. See you next time as we tackle Rugelach.


Tuesday, May 26, 2009

TWD: Chipster Topped Brownies

Two words - Delicious Disaster.


This was supposed to be a layer of decadent brownie topped with chocolate chip cookies. Later, it would be covered two scoops of vanilla ice cream and smothered in hot fudge. But...

I heard tales of overbaked cookie/brownies so I shaved 5 minutes off the time. The result was gooey middle (part of which fell on the floor!). Oops. Oh well, the rest was YUM and got sent to school with hubs with a note that said "looks ugly, tastes great."

I think folks appreciated my hodge podge additions. I added all the random chocolate chips in the cupboard as well as half a bag of heath bits I had left over from something. I will make this again but will bake for the full time. Oh, the lessons learned...

I wish I had photographed it before I took it out of the pan. It was golden brown and gorgeous! Pay no attention to these photos:


Head over to TWD to see how all the other bakers fared. You can also find a link to this week's featured baker and the recipe for this gem.

Monday, February 9, 2009

Amano y Amano

A really long time ago, I was selected as a lucky duck winner of two amazing bars of Amano chocolate from Blake Makes (a totally awesome food blog). Amano sent me the bars and well I just had to tell you guys about them.

First, let me state that I am a complete moron and took no pictures of the actual chocolate. I figured the Superbowl was a perfect time to let the chocolate duke it Amano y Amano. So, I let our Superbowl guests share the goodness. I guess I picked an appropriate day to share because once I put out the 4 oz of dark deliciousness, it was like penetrating my own defensive line just to get a nibble, much less a photo.

Anyway, here's the summary of our analysis:

Handcrafted Madagascar Dark Chocolate (70% Cocoa)
Definite citrus flavors, smooth and buttery, tangy

Handcrafted Jembrana Dark Chocolate (70% Cocoa)
Sweet, mild coffee flavors, super yummy!

I would love to use this amazing chocolate in a recipe. But, I am glad that we were able to taste it just as it was in order to really savor it. Head over to Amano and order yourself some. It's worth it!

Tuesday, October 28, 2008

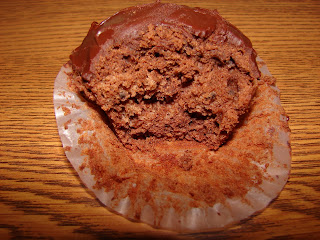
TWD: Chocolate Chocolate Cupcakes


This week's selection for TWD came from my BBB (best blog bud) CB. She's a cupcake freak and I knew this one would be a natural choice for her. I also wasn't surprised when she asked everyone to decorate their cuppys for Halloween since she's so timely and what not.

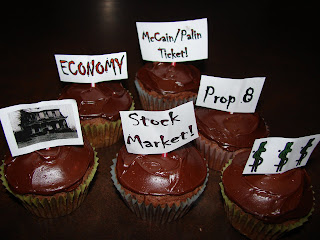
At first, I was stumped. Then, when watching the news, it came to me! Halloween = scary, right? What is the scariest thing right now? Check out my cuppies to see...


Seriously, I'm freakin' scared about our economy, housing market and stock market. My retirement account is the toilet. Thank goodness I don't need it for 30 years! And I can't even think about Prop 8 passing and a McCain/Palin administration.... ::shudder::

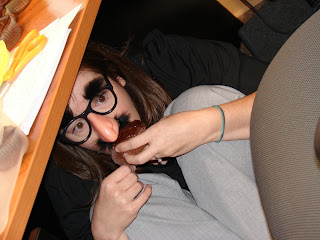
These cupcakes scared the bejebus out of me so much so that I had to hide under my desk, in disguise, so the scary economy monsters couldn't find me.

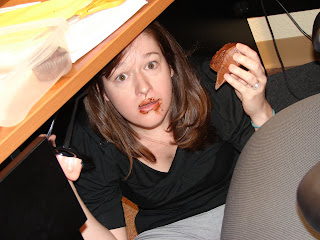
However, while taking solace in the delightful frightfuls, I was busted...


Oh well. I guess it was worth it. Now if only my IRA retirement account was as rich as these cupcakes, things would be allllll riiight.
About the cuppys: This wasn't my favorite chocolate cuppy recipe but I like it OK and the chocolate lovers at work thought it was delish. But, you all know I'm a vanilla girl at heart.

Check out my other TWD bakers and see all the boo-tiful treats.
HAPPY HALLOWEEN!

Tuesday, October 7, 2008

TWD: Caramel Peanut Topped Brownie Cake

Hi. My name is Rachel and I ate way too much of this week's recipe. I mean, seriously. Wouldn't you want to eat this:


I'm not even much of a chocolate fan but D-A-N-G was this cake good.

The cake was easy peasy and I can't believe I actually made homemade caramel. I mean, hello homemade caramel! I should at least get some kind of award for this.

My hubs and I ate all we could without exploding. I gave a hunk to my neighbor and took the rest to work. It's another winner, for sure and WAY easier than it sounds. You should make this cake now. DO IT!


Major love to Tammy of Wee Treats by Tammy for this week's selection. You can find the recipe on her blog. Also, make sure to check out the baked concoctions of my fellow TWD friends, all 300+ of them.

Side note about Tammy. She's is on the other side of the world from me and I remember when she first commented on my blog. I couldn't believe that anyone besides my Mom was reading what I wrote and I did a happy dance in my chair knowing I was connecting with someone so far away. She rocks!

PS I still have to write up last week. I'll do it when I can. TIA for your patience.

Monday, September 8, 2008

TWD: Chocolate Malted Whopper Drops

Get a load of this:


Drooling yet?

You should be. It was my turn to choose for TWD and I spent hours flipping between a few key recipes before I finally decided on this one. I'm not a huge chocolate fan but I LOVE malt and thought this would be a totally different yet fun recipe to try.

I actually made these twice. The first time, I was determined to take amazing pictures so I could showcase my awesome baking skills, superb photography talents, and really clean (for the photos) kitchen. However, after the cookies were gone far, far away to a potluck in the sky, er, at hubs school, I realized that there was no memory card in the camera. I raised a fist and decided that I'd have to make them again. So I did. The second time around, I made a few adjustments:

1. I got to bake with a good friend I rarely see.
2. I was a little short on chocolate chunks (semi-sweet) so I supplemented with mini chips which gave a fun texture.
3. I used a bit more than 2 cups of whoppers chopped (by my pal) into halves and thirds. I figured, the bigger, the better.
4. I also used regular flavor malt powder and not chocolate like some bakers did. That would have been way too chocolatey for me.


I really liked these cookies. I thought the chocolate flavor was pretty mild and the malt ratio was perfect. However, I got mixed reviews when I took them to work on Monday. Some people said they were too malty. Others said they needed more malt powder. I guess it all depends on how much you like malt. Hubs didn't care for them. Apparently, he doesn't like malt. Yeah, that would have been nice to know 3 weeks ago when I chose the recipe. Oh well, I liked them and that's good enough for me!

I loved how some of the whoppers caramelized, some were in whopper-y and some were in between. They final results were chewy, with a slight crunch and that soda shop taste. DELISH!

Thanks to my fellow TWD folks for baking my choice this week. And a bigger thanks to the blogger who figured out the temperature was to be 350 due to an omission in the book. You rock!

Next week - Claudia from Fool for Food has chosen Chocolate Chunkers. I leave you with some yummy pics and the recipe. Have a great week, all!


Chocolate Malted Whopper Drops
1.75 cups all purpose flour
1 cup malted milk powder
.25 cup unsweetened cocoa powder
1.5 teaspoon baking powder
.25 teaspoon salt
1 stick plus 3 tablespoons unsalted butter at room temp.
.66 cups sugar
2 large eggs
1 teaspoon pure vanilla extract
.25 cup whole milk
2 cups (6 ounces) chocolate-covered malted milk balls, coarsely chopped
6 ounces bittersweet chocolate, coarsely chopped or 1 cup store-bought choc chips or chunks

GETTING READY: Position the racks to divide the oven into thirds and line two baking sheets with parchment or silicone mats.
Sift together the flour, malted milk powder, cocoa, baking powder, and salt.
Working with a stand mixer, preferably fitted with a paddle attachment, or with a hand mixer in a large bowl, beat the butter and sugar together on medium speed for about 3 minutes, until very smooth. Add the eggs one at a time, beating for about a minute after each addition. Beat in the vanilla; don't be concerned in the mixture looks curdled - it will even out when the dry ingredients are added. Reduce the mixer speed to low and add half the dry ingredients, mixing just until they disappear in the the batter. Mix in the milk, then the remaining dry ingredients, mixing only until they are incorporated. The batter will look more like fudge frosting than cookie dough - and that's fine. With the mixer on low, or by hand with a rubber spatula, mix in the malted milk balls and chopped chocolate.
Drop the dough by rounded tablespoonfuls on to the sheets, leaving about 2 inches of space between spoonfuls. Bake for 11 to 13 minutes, rotating the sheets from top to bottom and front to back after 6 minutes. When done, the cookies will be puffed and set slightly but soft to the touch. Let the cookies rest for 2 minutes before using a wide metal spatula to transfer them to the racks to cool to room temperature.
Repeat with the remaining dough, cooling the baking sheets between batches.


Sunday, April 13, 2008

TWD - Marshmallows!


When I heard the weather report for the weekend, I was sure I wouldn't be TWD-ing this week. You see, Mother Nature got her months mixed up. She thought this was August, not April and decided we needed a 95 degree weekend.


Now, I love a hot summer day. We really only get a few each year. The rest of the calendar, we are treated to mild weather between 58 and 78 in my lovely town.

Needless to say, I was dang happy when I realized this week's recipe was a no bake. MARSHMALLOWS! However, I was a little freaked out because gelatin is grody and I cannot stand the way it smells. But, I did it. I made the chocolate marshmallows.


A few things I did differently - I used an 8x8 pan and a TON of cornstarch. I also made the chocolate one but mine were more choc chunk since I never could get the chocolate to be 'runny' melted.


They turned out OK but I'm not a huge marshmallow fan, at least when eaten alone. But, my coworkers thought they were good and that I was a genius for making them, which I am, of course. :D

Thanks to Judy for choosing this week's recipe. Now head over to TWD to see what the other baking geniuses created this week.


PS Gelatin stinks to high heaven. Ew.


Makes about 1 pound marshmallows

About 1 cup potato starch (found in the kosher foods section of supermarkets) or cornstarch

2 tablespoons light corn syrup

2 1/4-ounce packets unflavored gelatin

3 large egg whites, at room temperature

3/4 cup cold water

1 tablespoon pure vanilla extract

1 1/4 cups plus

1 tablespoon sugar


GETTING READY: Line a rimmed baking sheet -- choose one with a rim that is 1 inch high -- with parchment paper and dust the paper generously with potato starch or cornstarch. Have a candy thermometer at hand.


Put 1/3 cup of the water, 1 1/4 cups of the sugar and the corn syrup in a medium saucepan over medium heat. Bring the mixture to a boil, stirring until the sugar dissolves. Once the sugar is dissolved, continue to cook the syrup -- without stirring -- until it reaches 265 degrees F on the candy thermometer, about 10 minutes.


While the syrup is cooking, work on the gelatin and egg whites. In a microwave-safe bowl, sprinkle the gelatin over the remaining cold water (a scant 7 tablespoons) and let it sit for about 5 minutes, until it is spongy, then heat the gelatin in a microwave oven for 20 to 30 seconds to liquefy it. (Alternatively, you can dissolve the gelatin in a saucepan over low heat.)


Working in the clean, dry bowl of a stand mixer fitted with the whisk attachment or in another large bowl with a hand mixer, beat the egg whites on medium-high speed until firm but still glossy -- don't overbeat them and have them go dull.


As soon as the syrup reaches 265 degrees F, remove the pan from the heat and, with the mixer on medium speed, add the syrup, pouring it between the spinning beater(s) and the sides of the bowl. Add the gelatin and continue to beat for another 3 minutes, so that the syrup and the gelatin are fully incorporated. Beat in the vanilla.


Using a large rubber spatula, scrape the meringue mixture onto the baking sheet, laying it down close to a short end of the sheet. Then spread it into the corners and continue to spread it out, taking care to keep the height of the batter at 1 inch; you won't fill the pan. Lift the excess parchment paper up to meet the edge of the batter, then rest something against the paper so that it stays in place (I use custard cups).


Dust the top of the marshmallows with potato starch or cornstarch and let the marshmallows set in a cool, dry place. They'll need about 3 hours, but they can rest for 12 hours or more.


Once they are cool and set, cut the marshmallows with a pair of scissors or a long thin knife. Whatever you use, you'll have to rinse and dry it frequently. Have a big bowl with the remaining potato starch or cornstarch at hand and cut the marshmallows as you'd like -- into squares, rectangles or even strips (as they're cut in France). As each piece is cut, drop it into the bowl. When you've got 4 or 5 marshmallows in the bowl, reach in with your fingers and turn the marshmallows to coat them with starch, then, one by one, toss the marshmallows from one hand to the other to shake off the excess starch; transfer them to a serving bowl. Cut and coat the rest of the batch.


SERVING: Put the marshmallows out and let everyone nibble as they wish. Sometimes I fill a tall glass vase with the marshmallows and put it in the center of the table -- it never fails to make friends smile. You can also top hot chocolate or cold sundaes with the marshmallows.


STORING: Keep the marshmallows in a cool, dry place; don't cover them closely. Stored in this way, they will keep for about 1 week -- they might develop a little crust on the outside or they might get a little firmer on the inside, but they'll still be very good.


Playing Around

CHOCOLATE MARSHMALLOWS: Melt 3 ounces bittersweet or semisweet chocolate and stir in 2 1/2 tablespoons unsweetened cocoa powder. Reduce the vanilla extract to 1/4 teaspoon, and after the marshmallow batter is mixed, fold in the chocolate mixture with a large rubber spatula.

Monday, March 31, 2008

TWD - Gooey Chocolate Cakes


For this week's Tuesdays with Dorie, (a weekly bake & blog event) Lemon Tartlet, a girl after my own tart heart chose Gooey Chocolate Cakes.


Early in the week, I noticed that some folks were having trouble getting their cakes to "goo". I took their advice and shaved a minute off the baking time. Mine were a bit squishy in the center but goo they did not.


They were, as most Dorie recipes, totally tasty even for this non-chocolate lover. Dorie recommended using chocolate that you like so I used half the bitter sweet (60% cocoa) left over from something else and half semi-sweet chocolate. The combo was perfect and went great with a scoop of vanilla ice cream.


My only complaint was that this recipe made six little cakes that were to be eaten right away. I had a long and busy week and was not going to have company over the weekend. Since it's just hubs and I, we ended up wrapping the remaining cakes and will eat them up for dessert this week. (However, Weds is hubs bday so he gets to choose his treat.)


I'll definitely make these again but will do it when we have company. Thanks Lemon Tartlet for a great choice! Head on over to TWD (just click on my badge to the right) and see how goo'd the other bakers did this week.


PS I apologize for my terrible pictures this week. I think I took them with my eyes closed. I was so tired!


Gooey Chocolate Cakes
1/3 cup all-purpose flour
3 tablespoons unsweetened cocoa powder
¼ teaspoon salt
5 ounces bittersweet chocolate, (4 ounces coarsely chopped, 1 ounce very finely chopped)
1 stick (8 tablespoons) unsalted butter, cut into 8 pieces
2 large eggs, at room temperature
1 large egg yolk, at room temperature
6 tablespoons of sugar


Getting ready: Center a rack in the oven and preheat the oven to 400 degrees F. butter (or spray – it’s easier) 6 cups of a regular-size muffin pan, preferably a disposable aluminum foil pan, dust the insides with flour and tap out the excess. Put the muffin pan on a baking sheet.


Sift the flour, cocoa and salt together.


Set a heatproof bowl over a saucepan of gently simmering water, put the coarsely chopped chocolate and the butter in the bowl and stir occasionally over the simmering water just until they are melted – you don’t want them to get so hot that the butter separates. Remove the bowl from the pan of water.


In a large bowl, whisk the eggs and yolk until homogeneous. Add the sugar and whisk until well blended, about 2 minutes. Add the dry ingredients and, still using the whisk, stir (don’t beat) them into the eggs. Little by little, and using a light hand, stir in the melted chocolate and butter. Divide the batter evenly among the muffin cups and sprinkle the finely chopped chocolate over the batter.


Bake the cakes for 13 minutes. Transfer them, still on the baking sheet, to a rack to cool for 3 minutes. (There is no way to test that these cakes are properly baked, because the inside remains liquid.)


Line a cutting board with a silicone baking mat or parchment or wax paper, and, after the 3-minute rest, unmold the cakes onto the board. Use a wide metal spatula to lift the cakes onto dessert plates.

Tuesday, February 19, 2008

Tuesdays with Dorie - Almost Fudge Gâteau

I've been lurking on a blog called Tuesdays with Dorie for a few weeks. It's a site where a group of bakers take one recipe per week from Baking by Dorie Greenspan, bake it, then blog about it on Tuesdays. Totally adorable, right?

I've been patiently waiting for my book to arrive from Amazon and I seriously squeeled when it finally came. What is up with the free shipping taking so long to get here. Seriously, do they send your book 'round the world first? But, I digress.

This week's recipe was chosen by dear friend and fellow knottie, Nikki of Crazy Delicious. I've called her at least three times needing last minute cooking/baking advice so I knew whatever she chose would be excellent but also a good challenge for me.

When I flipped the book to page 218, I let out an "uh-oh" as my one and only springform pan was MIA. I'd searched the house for it recently when the mood struck me to make a cheesecake. So, after a quick Google search, I was off to Bed, Bath & Beyond for a new springform. I picked up some extra parchment, just in case, while I was there.


After a quick stop at the store for cream and chocolate, I came home and dug right in. I had already promised the hubs "Amazing Tacos" for dinner since I was off on Monday but thought I could get both done and I did! ::raising roof::


I was pretty nervous about all the double boiling and folding. I'm not exactly sure what folding is but I think it is kind of like enveloping the indrediant gently rather than just stirring it up. Surprisingly, I had no mishaps and the cake turned out AMAZING. The scariest part was flipping it over and I wish someone had taken a picture of me, with oven mitts flipping the cake with the hubs "spotting me". I called him over just for moral support but gave him his own mitts, just in case and he was so sweet to assume the position. Luckily everything turned out just fine.

This cake was sinful! Seriously. It was so rich and chocolatey. The hubs and I aren't huge chocolate fans so one small piece with a scoop of vanilla and we were good. I cut a couple pieces for the chocoholics in my office, a hunk for home (dessert tomorrow) and am sending the rest to work with hubs. His fellow teachers will luv me, I'm sure.


Overall, my first experience with TWD was a great one. I feel so proud that I baked something I can't even pronounce. Who thought this Texas lass gone west could Gâteau with the rest of 'em? I can't wait for next week!


Almost-Fudge Gâteau
5 large eggs

9 ounces bittersweet chocolate, coarsely chopped
1 cup of sugar
5 tablespoons unsalted butter, cut into chunks
2 tablespoons coffee or water
1/3 cup all-purpose flour
Pinch of salt

For the Glaze (optional)
4 ounces bittersweet chocolate, coarsely chopped
½ cup heavy cream
2 teaspoons light corn syrup

Getting Ready:
Center a rack in the oven and preheat the oven to 350 degrees F. Butter a 9-inch springform pan, line the bottom with parchment paper, butter the paper, dust the inside of the pan with flour and tap out the excess. Place the pan on a baking sheet lined with parchment or a silicone mat.


Separate the eggs, putting the whites in a mixer bowl or other large bowl and the yolks in a small bowl.


Set a heatproof bowl over a saucepan of simmering water and add the chocolate, sugar butter and coffee. Stir occasionally until the chocolate and butter are melted; the sugar may still be grainy, and that's fine. Transfer the bowl to the counter and let the mixture sit for 3 minutes.


Using a rubber spatula, stir in the yolks one by one, then fold in the flour.
Working with the whisk attachment of the mixer or a hand mixer, beat the egg whites with the pinch of salt until they hold firm, but glossy peaks. Using the spatula, stir about one quarter of the beaten whites into the batter, then gently fold in the rest. Scrape the butter into the pan and jiggle the pan from side to side a couple of times to even the batter.


Bake for 35 to 45 minutes, or until the cake has risen evenly (it might rise around the edges and you'll think it's done, but give it a few minutes more, and the center will puff too) and the top has firmed (it will probably be cracked) and doesn't shimmy when tapped; a thin knife inserted into the center should come out just slightly streaked with chocolate. Transfer the pan to a cooling rack and let the cake rest for 5 to 10 minutes.


Run a blunt knife gently around the edges of the cake and remove the sides of the pan. Carefully turn the cake over onto a rack and remove the pan bottom and the parchment paper. Invert the cake onto another rack and cool to room temperature right side up. As the cake cools, it may sink.


To Make the Optional Glaze:
First, turn the cooled cake over onto another rack so you'll be glazing the flat bottom, and place the rack over a baking sheet lined with parchment or wax paper to catch any drips.


Put the chocolate in a small heatproof bowl.
Melt the chocolate over a pan of simmering water or in a microwave oven – the chocolate should be just melted and only warm, not hot. Meanwhile, bring the cream to a boil in a small sauce pan. Pour the hot cream over the chocolate and stir very gently with a rubber spatula until the mixture is smooth and shiny. Stir in the corn syrup.


Pour the glaze over the cake and smooth the top with a long metal icing spatula. Don't worry if the glaze drips unevenly down the sides of the cake – it will just add to its charms. Allow the glaze to set at room temperature or, if you're impatient, slip the cake into the refrigerator for about 20 minutes. If the glaze dulls in the fridge, just give it a little gentle heat from a hairdryer.